EditorGUIUtility公共类相关内容
一、EditorGUIUtility公共类的作用是什么
二、资源加载
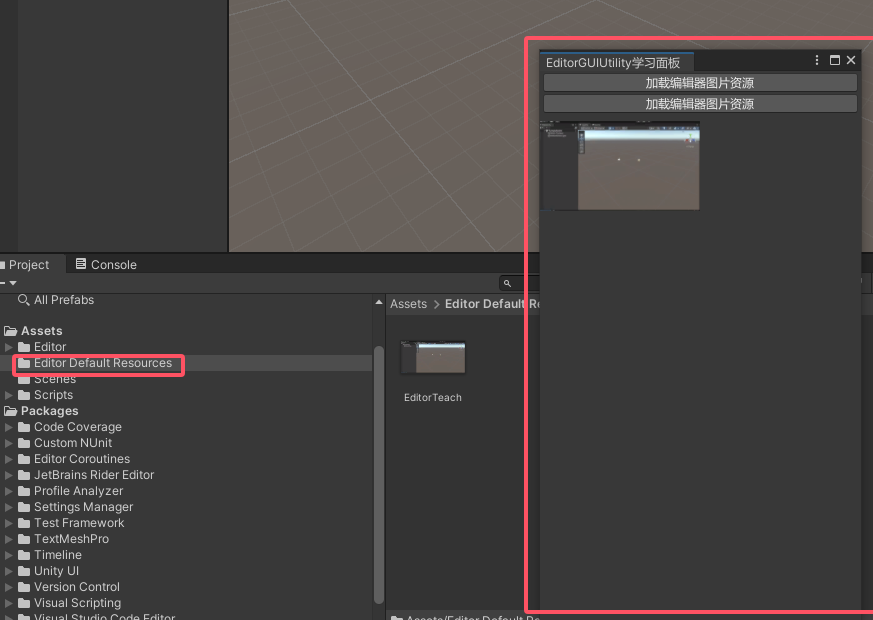
2.1 Editor Default Resources文件夹
- Editor Default Resources 也是Unity当中的一个特殊文件夹,它的主要作用是放置提供给 EditorGUIUtility 加载的资源
- 想要使用EditorGUIUtility公共类来加载资源
- 我们需要将资源放置在 Editor Default Resources 文件夹中
2.2 加载资源(如果资源不存在返回null)
- 方法
注意事项:
- 只能加载Assets/Editor Default Resources/文件夹下的资源
- 加载资源时,需要填写资源后缀名
- 示例
1
2
3
4
5
|
if (GUILayout.Button("加载编辑器图片资源"))
img = EditorGUIUtility.Load("EditorTeach.png") as Texture;
if (img != null)
GUI.DrawTexture(new Rect(0, 50, 160, 90), img);
|
2.3 加载资源(如果资源不存在会直接报错)
- 方法
注意事项:
- 只能加载Assets/Editor Default Resources/文件夹下的资源
- 加载资源时,需要填写资源后缀名
1
2
|
EditorGUIUtility.LoadRequired
|
- 示例
1
2
3
4
5
|
if (GUILayout.Button("加载编辑器图片资源"))
img2 = EditorGUIUtility.LoadRequired("EditorTeach.png") as Texture;
if (img2 != null)
GUI.DrawTexture(new Rect(0, 150, 160, 90), img2);
|
2.3 效果
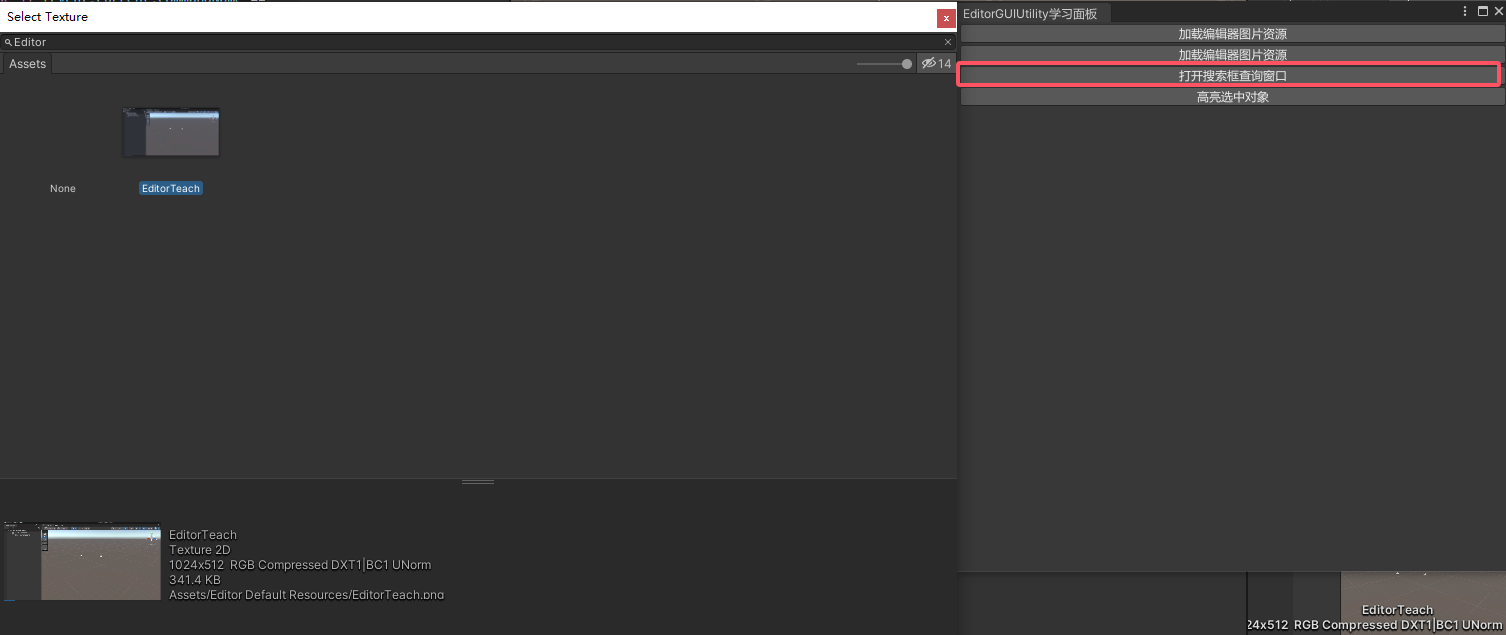
三、搜索框查询、对象选中提示
3.1 搜索框查询
- 主要作用:
弹出一个搜索窗口,用于选择自己想要的资源,只能打开窗口,无法监听选择的对象信息,需要配合第3点中的EditorGUIUtility.GetObjectPickerObject()进行使用
- 主要API:
1
| EditorGUIUtility.ShowObjectPicker<资源类型>(默认被选中的对象, 是否允许查找场景对象, "查找对象名称过滤", 0);
|
- 参数1. 默认被选中的对象的引用
- 参数2. 是否允许查找场景对象
- 参数3. 查找对象名称过滤(比如这里的normal是指文件名称中有normal的会被搜索到)
- 参数4. controlID, 默认写0
- 获取选择对象,主要API:
1
| EditorGUIUtility.GetObjectPickerObject()
|
- 弹出的搜索窗口会通过发送事件的形式,通知开启它的窗口对象信息的变化
- 通过Event公共类可以获取其它窗口发送给自己的事件。(即Event公共类会给当前打开的窗口发送事件信息)
- Event.current 获取当前事件
- commandName 获取事件命令的名字
- ObjectSelectorUpdated 对象选择发生变化时发送
- ObjectSelectorClosed 对象选择窗口关闭时发送
1
2
3
4
5
6
7
8
9
| if(Event.current.commandName == "ObjectSelectorUpdated")
{
}
else if (Event.current.commandName == "ObjectSelectorClosed")
{
}
|
- 示例
1
2
3
4
5
6
7
8
9
10
11
12
13
14
15
16
17
18
19
| private Texture img3;
if (GUILayout.Button("打开搜索框查询窗口"))
{
EditorGUIUtility.ShowObjectPicker<Texture>(null, false, "Editor", 0);
}
if (Event.current.commandName == "ObjectSelectorUpdated")
{
img3 = EditorGUIUtility.GetObjectPickerObject() as Texture;
if (img3 != null)
Debug.Log(img3.name);
}
else if (Event.current.commandName == "ObjectSelectorClosed")
{
img3 = EditorGUIUtility.GetObjectPickerObject() as Texture;
if (img3 != null)
Debug.Log("窗口关闭 - " + img3.name);
}
|
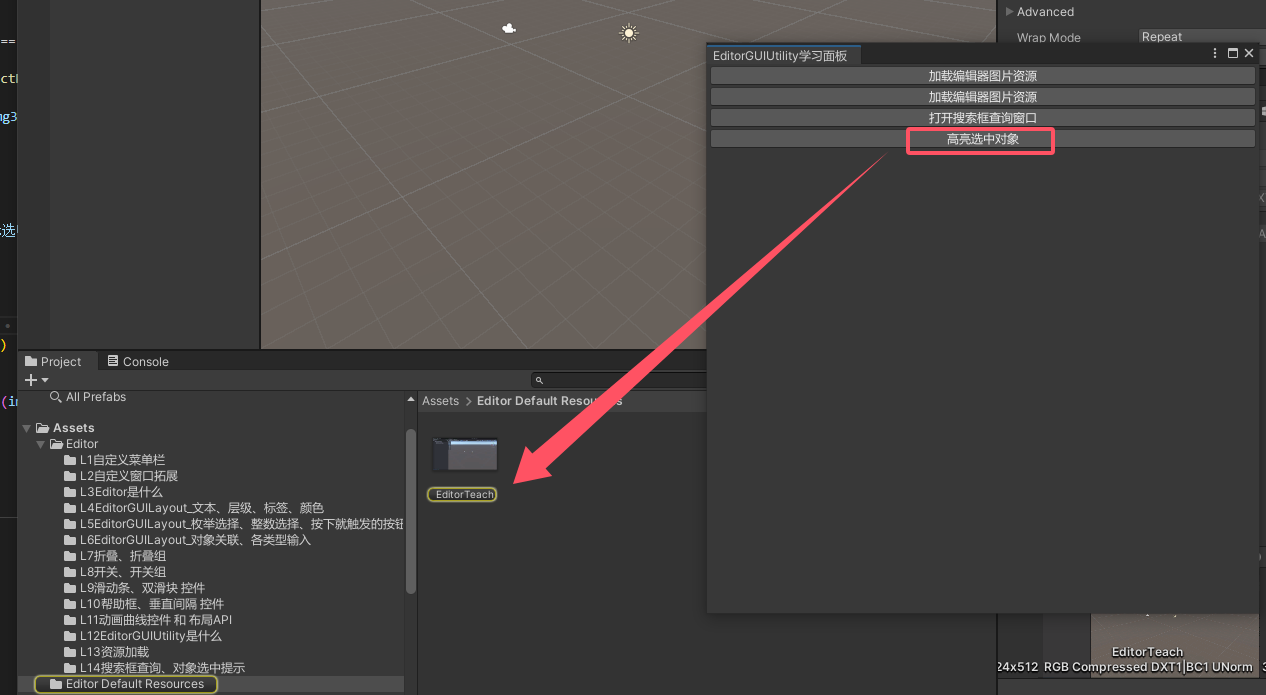
3.2 对象选中提示
- 方法
1
| EditorGUIUtility.PingObject(想要提示选中的对象);
|
- 示例
1
2
3
4
5
6
|
if (GUILayout.Button("高亮选中对象"))
{
if (img3 != null)
EditorGUIUtility.PingObject(img3);
}
|
3.3 效果
- 搜索框查询
- 对象选中提示
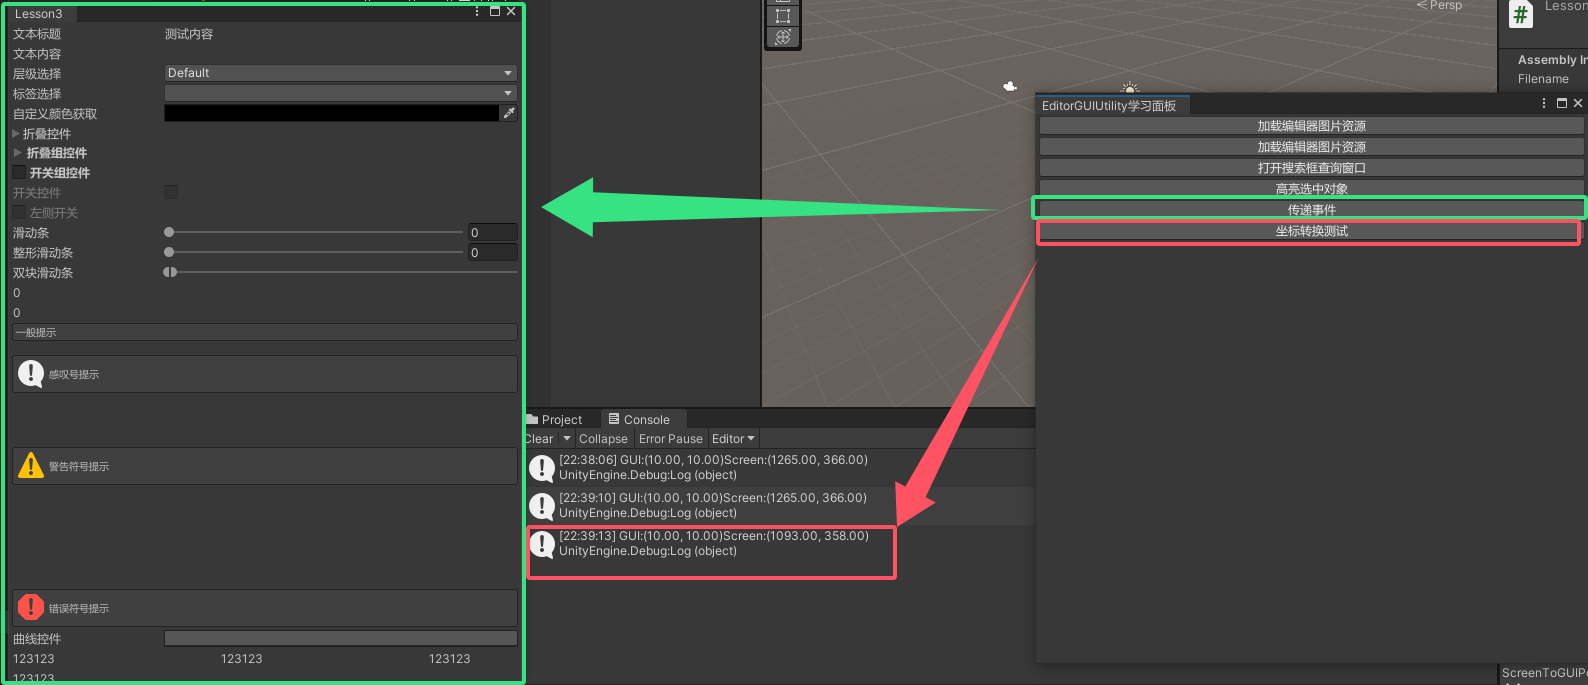
四、窗口事件传递、坐标转换
4.1 region 知识点一 窗口事件传递
- 方法
在传递事件时,会自动将接受事件的窗口打开,不管对象是否有监听处理对应的内容
1
2
3
4
5
| Event e = EditorGUIUtility.CommandEvent("事件名");
Event.current.type == EventType.ExecuteCommand 判断
Event.current.commandName == "事件名" 判断
|
- 示例
1
2
3
4
5
6
7
8
9
10
11
12
13
14
15
16
17
|
if (GUILayout.Button("传递事件"))
{
Event e = EditorGUIUtility.CommandEvent("测试事件");
Lesson3 win = EditorWindow.GetWindow<Lesson3>();
win.SendEvent(e);
}
if (Event.current.type == EventType.ExecuteCommand)
{
if (Event.current.commandName == "测试事件")
{
Debug.Log("收到测试事件");
}
}
|
4.2 坐标转换
- 屏幕坐标系:原点为屏幕左上角
- GUI坐标系:原点为当前窗口左上角
- 方法
-
GUIToScreenPoint:将点从GUI位置转换为屏幕空间
-
GUIToScreenRect:将rect从GUI位置转换为屏幕空间
-
ScreenToGUIPoint:将点从屏幕空间转换为GUI位置
-
ScreenToGUIRect:将rect从屏幕空间转换为GUI位置
- 示例
1
2
3
4
5
6
7
8
9
10
|
if (GUILayout.Button("坐标转换测试"))
{
Vector2 v = new Vector2(10, 10);
GUI.BeginGroup(new Rect(10, 10, 100, 100));
Vector2 screenPos = EditorGUIUtility.GUIToScreenPoint(v);
GUI.EndGroup();
Debug.Log("GUI:" + v + "Screen:" + screenPos);
}
|
4.3 效果
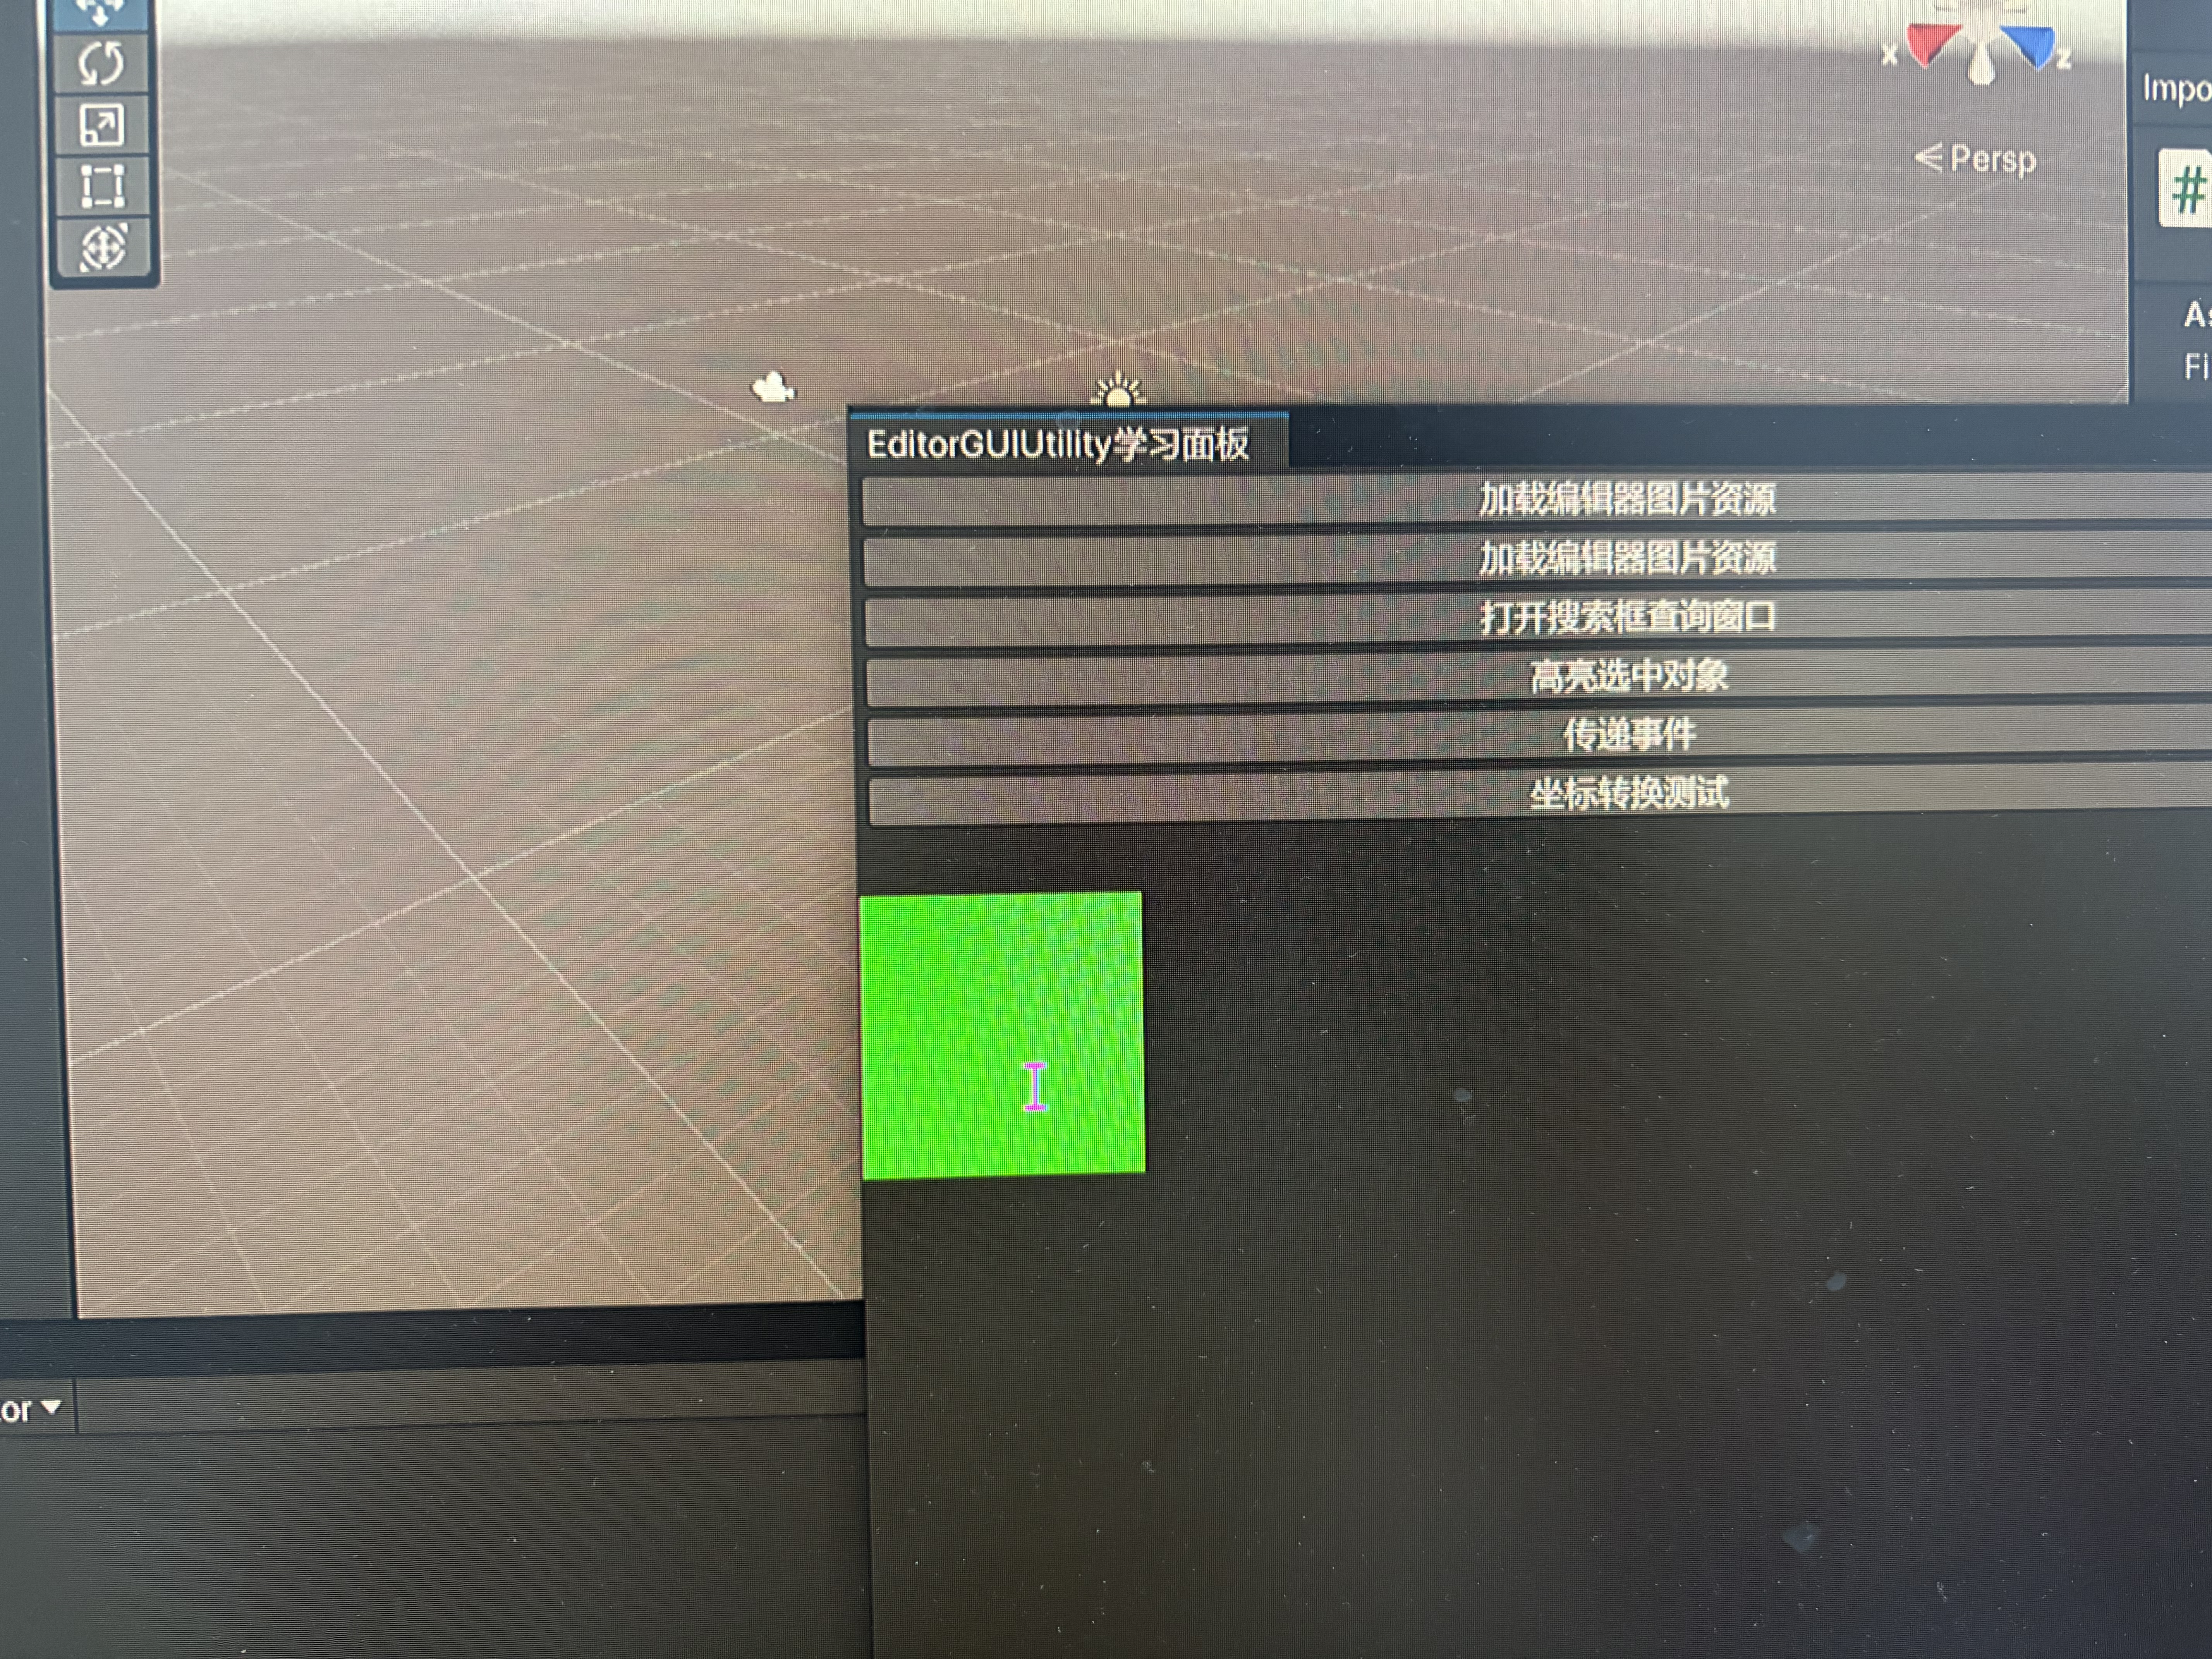
五、指定区域使用对应鼠标指针
5.1 方法
1
2
3
4
5
6
7
8
9
10
11
12
13
14
15
16
17
18
19
20
21
22
| AddCursorRect(Rect position, MouseCursor mouse);
|
5.2 示例
1
2
| EditorGUI.DrawRect(new Rect(0, 150, 100, 100), Color.green);
EditorGUIUtility.AddCursorRect(new Rect(0, 150, 100, 100), MouseCursor.Text);
|
5.3 效果
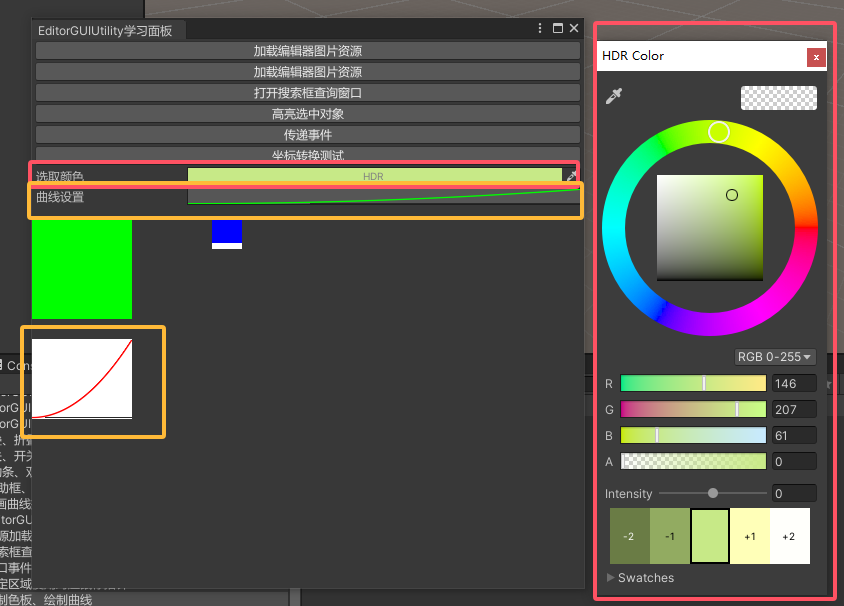
六、绘制色板、绘制曲线
6.1 绘制色板
- 方法
在指定区域绘制一个色板矩形,主要配合 EditorGUILayout.ColorField 颜色输入控件使用
1
| EditorGUIUtility.DrawColorSwatch(Rect 绘制色板的矩形, Color 颜色);
|
- 示例
1
2
3
4
| private Color color;
color = EditorGUILayout.ColorField(new GUIContent("选取颜色"), color, true, true, true);
EditorGUIUtility.DrawColorSwatch(new Rect(180, 180, 30, 30), Color.blue);
|
6.2 绘制曲线
- 方法
在指定区域绘制曲线,主要配合EditorGUILayout.CurveField 曲线输入控件使用
1
2
3
4
5
| EditorGUIUtility.DrawCurveSwatch(Rect 绘制曲线的范围,
AnimationCurve 曲线,
SerializedProperty 要绘制为SerializedProperty的曲线,
Color 绘制曲线的颜色,
Color 绘制背景的颜色);
|
- 示例
1
2
3
4
|
private AnimationCurve curve = new AnimationCurve();
curve = EditorGUILayout.CurveField("曲线设置", curve);
EditorGUIUtility.DrawCurveSwatch(new Rect(0, 300, 100, 80), curve, null, Color.red, Color.white);
|
6.3 效果
七、更多API
官方文档:https://docs.unity3d.com/ScriptReference/EditorGUIUtility.html